Notifications in Kotlin Oreo (8+)

Create a new Project in Kotlin

Message can display outside of our application normal UI

1 Open Android Studio.
2 Go to File => New => New Project. Write application name . Then, check Include Kotlin Support and click next button.
3Select minimum SDK you need. However, we have selected 17 as minimum SDK. Then, click next button
4 Then, select Empty Activity => click next => click finish.
5 You will get a newly created project successfully if you have followed steps properly.

added line in the build.gradle (Module: app) dependencies:

implementation 'com.android.support:appcompat-v7:26.1.0'

Use the below code to Implement a Notification with Kotlin

 MainActivity.k
import android.support.v7.app.AppCompatActivity
import android.os.Bundle
import android.view.View
import android.widget.*
import kotlinx.android.synthetic.main.activity_main.*
import android.widget.RadioGroup
import android.widget.Toast
import android.app.NotificationManager
import android.support.v4.app.NotificationCompat
import android.os.Build
import android.app.NotificationChannel
import android.content.Context
import android.support.annotation.RequiresApi
class MainActivity : AppCompatActivity() {

    override fun onCreate(savedInstanceState: Bundle?) {
        super.onCreate(savedInstanceState)
        setContentView(R.layout.activity_main)
   val button:Button=findViewById(R.id.button);
        button.setOnClickListener()

        {

            issueNotification()

        }
    }


    @RequiresApi(api = Build.VERSION_CODES.O)
    fun makeNotificationChannel(id: String, name: String, importance: Int) {
        val channel = NotificationChannel(id, name, importance)
        channel.setShowBadge(true) // set false to disable badges, Oreo exclusive

        val notificationManager = getSystemService(Context.NOTIFICATION_SERVICE) as NotificationManager

        notificationManager.createNotificationChannel(channel)
    }


    fun issueNotification() {

        // make the channel. The method has been discussed before.
        if (Build.VERSION.SDK_INT >= Build.VERSION_CODES.O) {
            makeNotificationChannel("CHANNEL_1", "Example channel", NotificationManager.IMPORTANCE_DEFAULT)
        }
        // the check ensures that the channel will only be made
        // if the device is running Android 8+

        val notification = NotificationCompat.Builder(this, "CHANNEL_1")
        // the second parameter is the channel id.
        // it should be the same as passed to the makeNotificationChannel() method

        notification
            .setSmallIcon(R.mipmap.ic_launcher) // can use any other icon
            .setContentTitle("Notification!")
            .setContentText("This is an Oreo notification!")
            .setNumber(3) // this shows a number in the notification dots

        val notificationManager = getSystemService(Context.NOTIFICATION_SERVICE) as NotificationManager

        notificationManager.notify(1, notification.build())
        // it is better to not use 0 as notification id, so used 1.
    }


}

activity_main.xml

<?xml version="1.0" encoding="utf-8"?>
<LinearLayout
        xmlns:android="http://schemas.android.com/apk/res/android"
        xmlns:tools="http://schemas.android.com/tools"
        android:id="@+id/root_layout"
        android:layout_width="match_parent"
        android:layout_height="match_parent"
        android:orientation="vertical">
 <Button

            android:id="@+id/button"
            android:layout_gravity="center"
            android:layout_width="wrap_content"
            android:layout_height="wrap_content"
            android:layout_marginTop="15dp"
            android:text="click"
    />
</LinearLayout>

Bottom Navigation View Android

BottomNavigationView creates bottom navigation bars, making it easy to explore and switch between top-level content views with a single tap.

Bottom Navigation Bar always stays at the bottom of your application and provides navigation between the views of your application.

Prerequisites

To be able to follow this tutorial, you’ll need:

Adding the Bottom NavigationView

To use BottomNavigationView in your project, make sure you have added the design support and the Android support artifact. To add these in your project add the below dependencies in your buid.gardle file

implementation 'com.android.support:design:28.0.0'

Now add the BottomNavigationView in the activity_main.xml file. Note that the FrameLayout serve as a container for the different fragments that are placed on it whenever the BottomNavigationView menu items are clicked. Add the below code in the activity_main.xml file.

<?xml version="1.0" encoding="utf-8"?>
<android.support.constraint.ConstraintLayout
        xmlns:android="http://schemas.android.com/apk/res/android"
        xmlns:tools="http://schemas.android.com/tools"
        android:layout_width="match_parent"
        android:layout_height="match_parent" xmlns:app="http://schemas.android.com/apk/res-auto"
        tools:context=".MainActivity">

    <FrameLayout
            android:id="@+id/container"
            android:layout_width="match_parent"
            android:layout_height="match_parent"/>


    <android.support.design.widget.BottomNavigationView
            android:id="@+id/navigationView"
            android:layout_width="0dp"
            android:layout_height="wrap_content"
            android:layout_marginEnd="0dp"
            android:layout_marginStart="0dp"
            android:background="?android:attr/windowBackground"
            app:layout_constraintBottom_toBottomOf="parent"
            app:layout_constraintLeft_toLeftOf="parent"
            app:layout_constraintRight_toRightOf="parent"
            app:itemBackground="@color/colorPrimary"
    />
</android.support.constraint.ConstraintLayout>

Here in the BottomNavigationView the menu items are added with bottom_menu.xml file

Add a file bottom_menu.xml in res/menu directory.

bottom_menu.xml

<?xml version="1.0" encoding="utf-8"?>
<menu xmlns:android="http://schemas.android.com/apk/res/android">

    <item
            android:id="@+id/navigation_songs"
            android:icon="@drawable/ic_action_favorites"
            android:title="@string/favorites"/>

    <item
            android:id="@+id/navigation_albums"
            android:icon="@drawable/ic_action_home"
            android:title="@string/home"/>

    <item
            android:id="@+id/navigation_artists"
            android:icon="@drawable/ic_action_settings"
            android:title="@string/settings"/>

</menu>

Setting the Activity class

Now we are going to setup NavigationView and NavigationItemSelectedListener .

package com.kotlincodes.bottomnavigationview

import android.support.v7.app.AppCompatActivity
import android.os.Bundle
import android.support.v4.app.Fragment
import kotlinx.android.synthetic.main.activity_main.*

class MainActivity : AppCompatActivity()  {

    override fun onCreate(savedInstanceState: Bundle?) {
        super.onCreate(savedInstanceState)
        setContentView(R.layout.activity_main)

        title=resources.getString(R.string.favorites)
        loadFragment(FavoriteFragment())

        navigationView.setOnNavigationItemSelectedListener {
            when(it.itemId){
                R.id.navigation_fav-> {
                    title=resources.getString(R.string.favorites)
                    loadFragment(FavoriteFragment())
                    return@setOnNavigationItemSelectedListener true
                }

                R.id.navigation_home-> {
                    title=resources.getString(R.string.home)
                    loadFragment(HomeFragment())
                    return@setOnNavigationItemSelectedListener true
                }

                R.id.navigation_settings-> {
                    title=resources.getString(R.string.settings)
                    loadFragment(SettingsFragment())
                    return@setOnNavigationItemSelectedListener true
                }

            }
            false

        }
    }

    private fun loadFragment(fragment: Fragment) {
        // load fragment
        val transaction = supportFragmentManager.beginTransaction()
        transaction.replace(R.id.container, fragment)
        transaction.addToBackStack(null)
        transaction.commit()
    }
}

Here we are not using the findViewById method to bind the views, we are just using synthetic binding extensions from Kotlin by importing the following

import kotlinx.android.synthetic.main.activity_main.*

We’ll start with the FavoriteFragment.kt class and you should follow a similar process for the remaining two fragment classes—HomeFragment.kt and SettingsFragment.kt.

The fragment added here is the basic one just uses one TextView, you can replace it with any Fragment.

FavoriteFragment.kt

package com.kotlincodes.bottomnavigationview

import android.os.Bundle
import android.support.v4.app.Fragment
import android.view.LayoutInflater
import android.view.View
import android.view.ViewGroup

class FavoriteFragment : Fragment(){
    override fun onCreateView(inflater: LayoutInflater, container: ViewGroup?, savedInstanceState: Bundle?): View? {
        return inflater.inflate(R.layout.fragment_fav,container,false)

    }
}

fragmet_fav.xml

<?xml version="1.0" encoding="utf-8"?>
<RelativeLayout
        xmlns:android="http://schemas.android.com/apk/res/android"
        android:layout_width="match_parent"
        android:layout_height="match_parent">

    <TextView android:layout_width="match_parent"
              android:layout_centerInParent="true"
              android:textAlignment="center"
              android:textSize="18sp"
              android:text="@string/favorites"
              android:layout_height="wrap_content"/>
</RelativeLayout>

That’s it! Now run the project! The full source code is available here.

Thanks for reading!

Android Splash Screen with Kotlin

Android Splash Screen is the 1st screen visible to user when app launches. Splash screen displays some animations or App logo for a short time while some data for the next screen are fetched.

Here we are going to implement a Splash Screen for Android with Kotlin.

Splash Screen is very common to most of the Android Applications. It is very easy to create Splash Screen using Handler class.

Create a Style resource

Update your style.xml file as shown below

style.xml

<resources>

    <!-- Base application theme. -->
    <style name="AppTheme" parent="Theme.AppCompat.Light.DarkActionBar">
        <!-- Customize your theme here. -->
        <item name="colorPrimary">@color/colorPrimary</item>
        <item name="colorPrimaryDark">@color/colorPrimaryDark</item>
        <item name="colorAccent">@color/colorAccent</item>
    </style>

    <style name="AppTheme.NoActionBar">
        <item name="windowActionBar">false</item>
        <item name="windowNoTitle">true</item>
    </style>

</resources>

Create Layout XML file for SplashScreen

activity_splash.xml

<?xml version="1.0" encoding="utf-8"?>
<RelativeLayout xmlns:android="http://schemas.android.com/apk/res/android"
    android:background="#464545"
    xmlns:app="http://schemas.android.com/apk/res-auto"
    xmlns:tools="http://schemas.android.com/tools"
    android:layout_width="match_parent"
    android:layout_height="match_parent"
    tools:context=".MainActivity">

    <ImageView
        android:id="@+id/image"
        android:src="@drawable/kotlincodes"
        android:layout_width="100dp"
        android:layout_height="100dp"
        android:layout_centerInParent="true"
        />
    <TextView
        android:id="@+id/text"
        android:textColor="#fff"
        android:gravity="center"
        android:text="kotlincodes.com"
        android:layout_below="@id/image"
        android:layout_width="match_parent"
        android:layout_height="wrap_content" />
    <ProgressBar
        android:layout_below="@id/text"
        android:layout_centerHorizontal="true"
        android:padding="6dp"
        android:layout_width="45dp"
        android:layout_height="45dp" />

</RelativeLayout>

This layout contains an ImageViw ,TextView and a ProgressBar. 

You can replace android:src of the ImageView with your own Image.

Create Splash Screen Activity Class

Here we uses a Handler to make a small delay. You can implement data fetching or any function in postDelayed method in Handler.

SplashScreenActivity.kt

package com.kotlincodes.splashscreenwithkotlin

import android.content.Intent
import android.os.Bundle
import android.os.Handler
import android.support.v7.app.AppCompatActivity

class SplashScreenActivity : AppCompatActivity() {
    private val SPLASH_TIME_OUT:Long=3000 // 3 sec
    override fun onCreate(savedInstanceState: Bundle?) {
        super.onCreate(savedInstanceState)
        setContentView(R.layout.activity_splash)


        Handler().postDelayed({
            // This method will be executed once the timer is over
            // Start your app main activity

            startActivity(Intent(this,MainActivity::class.java))

            // close this activity
            finish()
        }, SPLASH_TIME_OUT)
    }
}

Create a MainActivity 

activity_main.xml

<?xml version="1.0" encoding="utf-8"?>
<RelativeLayout xmlns:android="http://schemas.android.com/apk/res/android"
    android:background="#464545"
    xmlns:app="http://schemas.android.com/apk/res-auto"
    xmlns:tools="http://schemas.android.com/tools"
    android:layout_width="match_parent"
    android:layout_height="match_parent"
    tools:context=".MainActivity">

    <TextView
        android:textSize="22dp"
        android:layout_centerInParent="true"
        android:text="Home Page"
        android:textColor="#fff"
        android:layout_width="wrap_content"
        android:layout_height="wrap_content" />

</RelativeLayout>

MainActivity.kt

package com.kotlincodes.splashscreenwithkotlin

import android.support.v7.app.AppCompatActivity
import android.os.Bundle

class MainActivity : AppCompatActivity() {

    override fun onCreate(savedInstanceState: Bundle?) {
        super.onCreate(savedInstanceState)
        setContentView(R.layout.activity_main)
    }
}

Add SplashScreen Activity as Launch page in manifest

Add the below code in manifets.xml file under application tag.

<activity android:name=".SplashScreenActivity"
            android:theme="@style/AppTheme.NoActionBar"
            >
            <intent-filter>
                <action android:name="android.intent.action.MAIN" />

                <category android:name="android.intent.category.LAUNCHER" />
            </intent-filter>
        </activity>
        <activity android:name=".MainActivity" />
        

That’s it! Now run the project!

The full source code is available here.

Thanks for reading!


Google Map API with Kotlin

Here we are going to learn how to add a google map our project using google maps API with Kotlin.

Here we are developing a simple app with Google map and adding a marker to it.

Generate Google Maps API Key

Before we are starting to use a google map in our project we need to generate a Google Maps API key from Google API Console .

  • Login to Google API Console with your google account
  • Create a project then create credentials –>API Key as shown below
  • Copy Api Key Credential

Add Google Map into our Project

Now we need to add our API Key into our manifest.xml file under application tag.  Copy the below code and add it into the
manifest.xml under application tag.

manifest.xml

<meta-data
            android:name="com.google.android.maps.v2.API_KEY"
            android:value="YOUR_API_KEY"
            />

Don’t forget to replace “YOUR_API_KEY” with your API key from Google API Console

Setup Layout

Now we need to setup our Layout for Google maps. Copy and paste the below code into activity_mail.xml file.

activity_mail.xml

<?xml version="1.0" encoding="utf-8"?>
<LinearLayout xmlns:android="http://schemas.android.com/apk/res/android"
    xmlns:app="http://schemas.android.com/apk/res-auto"
    xmlns:tools="http://schemas.android.com/tools"
    android:layout_width="match_parent"
    android:layout_height="match_parent"
    tools:context=".MainActivity">

    <fragment xmlns:tools="http://schemas.android.com/tools"
        android:name="com.google.android.gms.maps.SupportMapFragment"
        android:id="@+id/map"
        android:layout_width="match_parent"
        android:layout_height="wrap_content">

    </fragment>

</LinearLayout> 

Setup MainActivity.kt

To set up map in our application please copy and paste below code into your activity class.

package com.kotlincodes.googlemapwithkotlin

import android.os.Bundle
import android.support.v7.app.AppCompatActivity
import com.google.android.gms.maps.CameraUpdateFactory
import com.google.android.gms.maps.GoogleMap
import com.google.android.gms.maps.OnMapReadyCallback
import com.google.android.gms.maps.SupportMapFragment
import com.google.android.gms.maps.model.LatLng
import com.google.android.gms.maps.model.MarkerOptions

class MainActivity : AppCompatActivity() ,OnMapReadyCallback {
    private var googleMap:GoogleMap?=null
   override fun onCreate(savedInstanceState: Bundle?) {
        super.onCreate(savedInstanceState)
        setContentView(R.layout.activity_main)
        val mapFragment = supportFragmentManager
                .findFragmentById(R.id.map) as SupportMapFragment
        mapFragment.getMapAsync(this)

    }
    override fun onMapReady(p0: GoogleMap?) {
        googleMap=p0

        //Adding markers to map

        val latLng=LatLng(28.6139,77.2090)
        val markerOptions:MarkerOptions=MarkerOptions().position(latLng).title("New Delhi")

        // moving camera and zoom map

        val zoomLevel = 12.0f //This goes up to 21


        googleMap.let {
            it!!.addMarker(markerOptions)
            it.moveCamera(CameraUpdateFactory.newLatLngZoom(latLng, zoomLevel))
        }
    }
}

That’s it! Now run the project!

The full source code is available here.

Thanks for reading!


Shared Preferences With Kotlin

In this tutorial we are going to learn how to use SharedPreferences In our Android Application to Store data in the form of value-key pairs with a simple Kotlin class.

Here w are going to learn how to create a simple custom SharedPreferences.kt class that can be used to every Android application if needed.

Overview

In many cases, we have to use SharedPreferences in our Application such as to store login status, save user-specific data and save application settings.

SharedPreferences is Application specific, so data stored in SharedPreferences can be lost in the following situations

  • By Uninstalling the Application
  • By Clearing application data (Using device settings)

Storing Data with SharedPreferences

Let’s start with the custom SharedPreference.kt class. Create a Kotlin class And Initialise SharedPreferences as shown below.

package com.kotlincodes.sharedpreferenceswithkotlin

import android.content.Context
import android.content.SharedPreferences

/**
 * Created by Kolincodes on 10/05/2018.
 */

class SharedPreference(val context: Context) {
    private val PREFS_NAME = "kotlincodes"
    val sharedPref: SharedPreferences = context.getSharedPreferences(PREFS_NAME, Context.MODE_PRIVATE)

}

PREF_NAME is the name of preference file.

Storing Data

To store String, Int and Boolean data we have three methods with the same name and different parameters (Method overloading). Add these methods to your  SharedPreference.kt class.

To Store String data

 
 fun save(KEY_NAME: String, value: Int) {
        val editor: SharedPreferences.Editor = sharedPref.edit()

        editor.putInt(KEY_NAME, value)

        editor.commit()
    }
    

To Store Int data

  
  fun save(KEY_NAME: String, value: Int) {
        val editor: SharedPreferences.Editor = sharedPref.edit()

        editor.putInt(KEY_NAME, value)

        editor.commit()
    }
    

To Store Boolean data

 
 fun save(KEY_NAME: String, status: Boolean) {

        val editor: SharedPreferences.Editor = sharedPref.edit()

        editor.putBoolean(KEY_NAME, status!!)

        editor.commit()
    }

Retrieve Data

To Retrieve the data stored in SharedPreferences use the following methods.

To Retrieve String

 
 fun getValueString(KEY_NAME: String): String? {

        return sharedPref.getString(KEY_NAME, null)
    }

To Retrieve Int

fun getValueInt(KEY_NAME: String): Int {

        return sharedPref.getInt(KEY_NAME, 0)
    }
    

To Retrieve Boolien

 
 fun getValueString(KEY_NAME: String): String? {

        return sharedPref.getString(KEY_NAME, null)
    }
    

Remove and Clear

To clear the entire SharedPreferences use the below code

 
 fun clearSharedPreference() {

        val editor: SharedPreferences.Editor = sharedPref.edit()

        //sharedPref = PreferenceManager.getDefaultSharedPreferences(context);

        editor.clear()
        editor.commit()
    }
    

To remove a specific data

 
 fun removeValue(KEY_NAME: String) {

        val editor: SharedPreferences.Editor = sharedPref.edit()

        editor.remove(KEY_NAME)
        editor.commit()
    }
    

Now we are almost done with all the methods inside our SharedPreference.kt class.
Please find the Complete code for  SharedPreference.kt file below.

SharedPreference.kt

package com.kotlincodes.sharedpreferenceswithkotlin

import android.content.Context
import android.content.SharedPreferences

/**
 * Created by Kolincodes on 10/05/2018.
 */

class SharedPreference(val context: Context) {
    private val PREFS_NAME = "kotlincodes"
    val sharedPref: SharedPreferences = context.getSharedPreferences(PREFS_NAME, Context.MODE_PRIVATE)

    fun save(KEY_NAME: String, text: String) {

        val editor: SharedPreferences.Editor = sharedPref.edit()

        editor.putString(KEY_NAME, text)

        editor!!.commit()
    }

    fun save(KEY_NAME: String, value: Int) {
        val editor: SharedPreferences.Editor = sharedPref.edit()

        editor.putInt(KEY_NAME, value)

        editor.commit()
    }

    fun save(KEY_NAME: String, status: Boolean) {

        val editor: SharedPreferences.Editor = sharedPref.edit()

        editor.putBoolean(KEY_NAME, status!!)

        editor.commit()
    }

    fun getValueString(KEY_NAME: String): String? {

        return sharedPref.getString(KEY_NAME, null)


    }

    fun getValueInt(KEY_NAME: String): Int {

        return sharedPref.getInt(KEY_NAME, 0)
    }

    fun getValueBoolien(KEY_NAME: String, defaultValue: Boolean): Boolean {

        return sharedPref.getBoolean(KEY_NAME, defaultValue)

    }

    fun clearSharedPreference() {

        val editor: SharedPreferences.Editor = sharedPref.edit()

        //sharedPref = PreferenceManager.getDefaultSharedPreferences(context);

        editor.clear()
        editor.commit()
    }

    fun removeValue(KEY_NAME: String) {

        val editor: SharedPreferences.Editor = sharedPref.edit()

        editor.remove(KEY_NAME)
        editor.commit()
    }
}

Implement in our Application

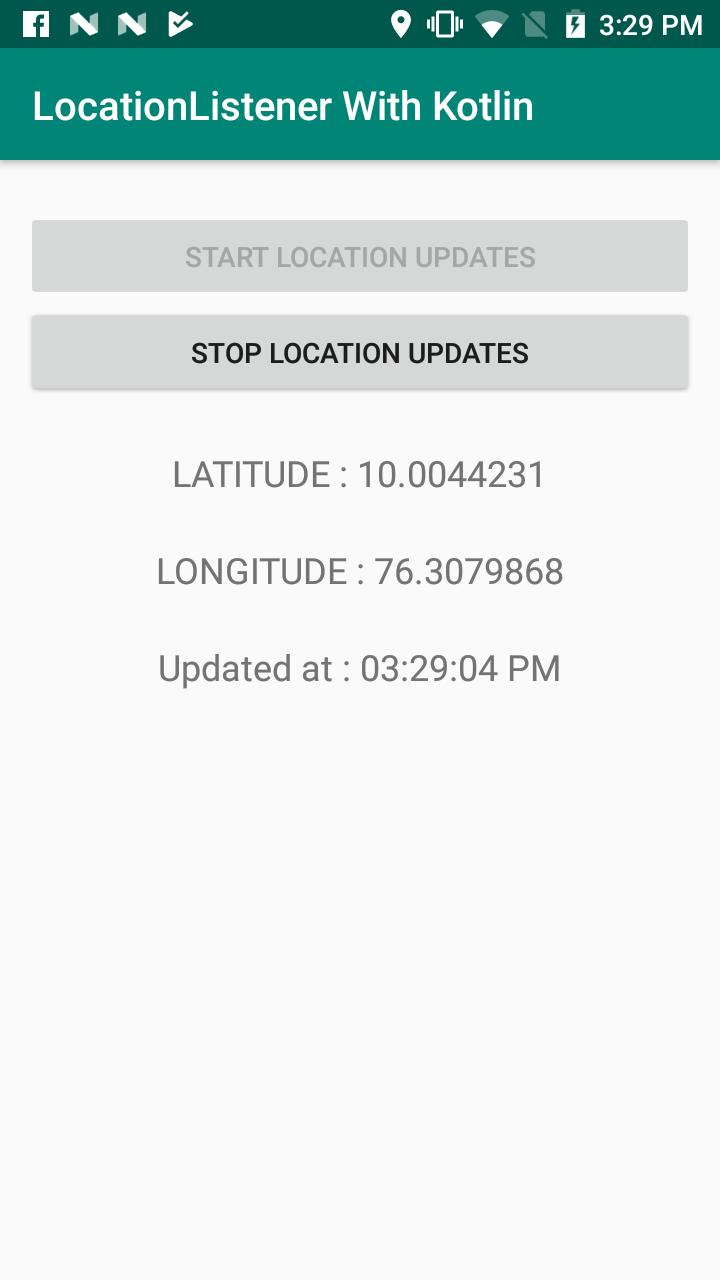
N we are going to implement our SharedPreference.kt class in a Simple Android Application.

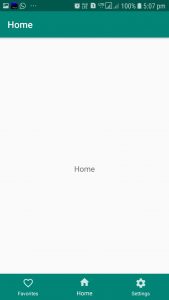
The Image below Shows the Final output of the project

Setup Layout

The Layout for our MainActivity.kt class is shown below.

<?xml version="1.0" encoding="utf-8"?>
<LinearLayout xmlns:android="http://schemas.android.com/apk/res/android"
    android:orientation="vertical"
    android:layout_margin="12dp"
    xmlns:tools="http://schemas.android.com/tools"
    android:layout_width="match_parent"
    android:layout_height="wrap_content"
    tools:context=".MainActivity">

    <EditText
        android:id="@+id/edt_name"
        android:layout_margin="6dp"
        android:hint="Name"
        android:layout_width="match_parent"
        android:layout_height="wrap_content"

        />
    <EditText
        android:id="@+id/edt_email"
        android:layout_margin="6dp"
        android:hint="Email"
        android:layout_width="match_parent"
        android:layout_height="wrap_content"

        />
    <LinearLayout
        android:layout_marginTop="12dp"
        android:layout_width="match_parent"
        android:layout_height="wrap_content">
        <Button
            android:id="@+id/btn_save"
            android:layout_weight="1"
            android:text="Save"
            android:layout_width="0dp"
            android:layout_height="wrap_content" />
        <Button
            android:id="@+id/btn_retriev"
            android:layout_weight="1"
            android:text="Retrieve"
            android:layout_width="0dp"
            android:layout_height="wrap_content" />
        <Button
            android:id="@+id/btn_clear"
            android:layout_weight="1"
            android:text="Clear"
            android:layout_width="0dp"
            android:layout_height="wrap_content" />

    </LinearLayout>
</LinearLayout>

Setup MainActivity

Our Application have only one page with two EditText and Three Button.

First we Initialize our SharedPreferece.kt class in our MainActivity by

val sharedPreference:SharedPreference=SharedPreference(this)

On Save button click We stores EditText values into SharedPreferences.

On Retrieve Button click we Retrieve the saved data from SharedPreferences and set this data as the EditText hint.

On Clear button click we clear all the data from shared preferences.

Our MainActivity.kt class is given below.

package com.kotlincodes.sharedpreferenceswithkotlin

import android.support.v7.app.AppCompatActivity
import android.os.Bundle
import android.widget.Button
import android.widget.EditText
import android.widget.Toast

class MainActivity : AppCompatActivity() {

    lateinit var edtName:EditText
    lateinit var edtEmail:EditText
    lateinit var btnSave:Button
    lateinit var btnRetrive:Button
    lateinit var btnClear:Button
    override fun onCreate(savedInstanceState: Bundle?) {
        super.onCreate(savedInstanceState)
        setContentView(R.layout.activity_main)
        val sharedPreference:SharedPreference=SharedPreference(this)

        edtName=findViewById(R.id.edt_name)
        edtEmail=findViewById(R.id.edt_email)
        btnClear=findViewById(R.id.btn_clear)
        btnSave=findViewById(R.id.btn_save)
        btnRetrive=findViewById(R.id.btn_retriev)

        btnSave.setOnClickListener {

            val name=edtName.editableText.toString()
            val email=edtEmail.editableText.toString()
            sharedPreference.save("name",name)
            sharedPreference.save("email",email)
            Toast.makeText(this@MainActivity,"Data Stored",Toast.LENGTH_SHORT).show()
            //to save an Int
//            sharedPreference.save("intval",1)

            //to save boolien
//            sharedPreference.save("bool",true)
            
        }
        btnRetrive.setOnClickListener {
            if (sharedPreference.getValueString("name")!=null) {
                edtName.hint = sharedPreference.getValueString("name")!!
                Toast.makeText(this@MainActivity,"Data Retrieved",Toast.LENGTH_SHORT).show()
            }else{
                edtName.hint="NO value found"
            }
            if (sharedPreference.getValueString("email")!=null) {
                edtEmail.hint = sharedPreference.getValueString("email")!!
            }else{
                edtEmail.hint="No value found"
            }


        }

        btnClear.setOnClickListener {
            sharedPreference.clearSharedPreference()
            Toast.makeText(this@MainActivity,"Data Cleared",Toast.LENGTH_SHORT).show()
        }
    }
}

That’s it! Now run the project!

The full source code is available here.

Thanks for reading!


LocationListener With Kotlin

Many of the android applications we uses in daily life  needs users current locations continuously,   Here we are going to implement LocationListener with Kotlin using FusedLocationProviderClient . We have previously used FusedLocationProviderApi which is deprecated now.

Add the permissions & Dependency

To access the location from the device add the following permissions to the manifest.xml file .

<uses-permission android:name=”android.permission.ACCESS_COARSE_LOCATION”/>
<uses-permission android:name=”android.permission.ACCESS_FINE_LOCATION”/>

Add the following dependencies into app level  build.gradle ( Module:app) file.

implementation ‘com.google.android.gms:play-services-location:16.0.0’

Setup the Layout file

Setup layout file for our home screen. It has two Buttons and three TextViews as shown below

activity_main.xml

<?xml version="1.0" encoding="utf-8"?>
<LinearLayout 
    xmlns:android="http://schemas.android.com/apk/res/android"
    android:orientation="vertical"
    xmlns:app="http://schemas.android.com/apk/res-auto"
    xmlns:tools="http://schemas.android.com/tools"
    android:layout_width="match_parent"
    android:layout_height="match_parent"
    tools:context=".MainActivity">

    <Button
        android:id="@+id/btn_start_upds"
        android:layout_width="match_parent"
        android:layout_marginRight="12dp"
        android:layout_marginLeft="12dp"
        android:layout_marginTop="24dp"
        android:layout_height="wrap_content"
        android:text="Start Location UPDates" />
    <Button
        android:enabled="false"
        android:id="@+id/btn_stop_upds"
        android:layout_width="match_parent"
        android:layout_marginRight="12dp"
        android:layout_marginLeft="12dp"
        android:layout_height="wrap_content"
        android:text="Stop Location UPDates" />


    <TextView
        android:padding="12dp"
        android:layout_marginTop="12dp"
        android:textSize="18sp"
        android:layout_marginRight="12dp"
        android:layout_marginLeft="12dp"
        android:layout_width="wrap_content"
        android:layout_gravity="center_horizontal"
        android:layout_height="wrap_content"
        android:id="@+id/txtLat"
        />
    <TextView
        android:padding="12dp"
        android:layout_gravity="center_horizontal"
        android:textSize="18sp"
        android:layout_marginRight="12dp"
        android:layout_marginLeft="12dp"
        android:layout_width="wrap_content"
        android:layout_height="wrap_content"
        android:id="@+id/txtLong"
        />
    <TextView
        android:layout_gravity="center_horizontal"
        android:padding="12dp"
        android:textSize="18sp"
        android:layout_marginRight="12dp"
        android:layout_marginLeft="12dp"
        android:layout_width="wrap_content"
        android:layout_height="wrap_content"
        android:id="@+id/txtTime" />
    
</LinearLayout>

Setup the MainActivity

Here we are going to learn how to implement location Listener in our MainActivity.kt Class with all details.

First we have to initialize

Check Permissions

From android version 6 (Marshmallow ) user have to accept all the permissions in run time. So we have to check whether used accepted all the permissions needed in run time .

We have added the permissions in manifest file already now to show the Runtime permission, You should do the following method.

  
  fun checkPermissionForLocation(context: Context): Boolean {
        return if (Build.VERSION.SDK_INT >= Build.VERSION_CODES.M) {

            if (context.checkSelfPermission(Manifest.permission.ACCESS_FINE_LOCATION) ==
                    PackageManager.PERMISSION_GRANTED){
                true
            }else{
                // Show the permission request
                ActivityCompat.requestPermissions(this, arrayOf(android.Manifest.permission.ACCESS_FINE_LOCATION),
                        REQUEST_PERMISSION_LOCATION)
                false
            }
        } else {
            true
        }
    }
    

Now we have to implement onRequestPermissionsResult method to check if the permission is granted or not by the user.

override fun onRequestPermissionsResult(requestCode: Int, permissions: Array<out String>, grantResults: IntArray) {
    if (requestCode == REQUEST_PERMISSION_LOCATION) {
        if (grantResults[0] == PackageManager.PERMISSION_GRANTED) {
    //We have to add startlocationUpdate() method later instead of Toast
            Toast.makeText(this,"Permission granted",Toast.LENGTH_SHORT).show()
        }
    }
}

Check Location is ON

To check location is on we have to add the following code to our project.

private fun buildAlertMessageNoGps() {

    val builder = AlertDialog.Builder(this)
    builder.setMessage("Your GPS seems to be disabled, do you want to enable it?")
            .setCancelable(false)
            .setPositiveButton("Yes") { dialog, id ->
startActivityForResult(Intent(Settings.ACTION_LOCATION_SOURCE_SETTINGS)
                        , 11)
            }
.setNegativeButton("No") { dialog, id ->
dialog.cancel()
                finish()
            }
val alert: AlertDialog  = builder.create()
    alert.show()


}

Setup LocationListener

Now we are going to setup the LocationListener using startLocationUpdates() method. Before that we have to add a LocationCallback as given below.

  
  private val mLocationCallback = object : LocationCallback() {
        override fun onLocationResult(locationResult: LocationResult) {
            // do work here
            locationResult.lastLocation
            onLocationChanged(locationResult.lastLocation)
        }
    }

    fun onLocationChanged(location: Location) {
        // New location has now been determined

       mLastLocation = location
        if (mLastLocation != null) {
// Update the UI from here
        }

        
    }
    

Now Add startLocationUpdates() method to your code as follows

 
 protected fun startLocationUpdates() {

        // Create the location request to start receiving updates
        mLocationRequest = LocationRequest()
        mLocationRequest!!.priority = LocationRequest.PRIORITY_HIGH_ACCURACY
        mLocationRequest!!.setInterval(INTERVAL)
        mLocationRequest!!.setFastestInterval(FASTEST_INTERVAL)

        // Create LocationSettingsRequest object using location request
        val builder = LocationSettingsRequest.Builder()
        builder.addLocationRequest(mLocationRequest!!)
        val locationSettingsRequest = builder.build()

        val settingsClient = LocationServices.getSettingsClient(this)
        settingsClient.checkLocationSettings(locationSettingsRequest)

        mFusedLocationProviderClient = LocationServices.getFusedLocationProviderClient(this)
        // new Google API SDK v11 uses getFusedLocationProviderClient(this)
        if (ActivityCompat.checkSelfPermission(this, Manifest.permission.ACCESS_FINE_LOCATION) != PackageManager.PERMISSION_GRANTED && ActivityCompat.checkSelfPermission(this, Manifest.permission.ACCESS_COARSE_LOCATION) != PackageManager.PERMISSION_GRANTED) {


            return
        }
        mFusedLocationProviderClient!!.requestLocationUpdates(mLocationRequest, mLocationCallback,
                Looper.myLooper())
    }
    

To Stop Location Updates add the following

 
 private fun stoplocationUpdates() {
        mFusedLocationProviderClient!!.removeLocationUpdates(mLocationCallback)
    }
    

Now we are all set to run the project. Please find the Complete code for MainActivity.kt file below.

MainActivity.kt

package com.kotlincodes.locationlistenerwithkotlin

import android.Manifest
import android.content.Context
import android.content.Intent
import android.content.pm.PackageManager
import android.location.Location
import android.location.LocationManager
import android.os.Build
import android.os.Bundle
import android.os.Looper
import android.provider.Settings
import android.support.v4.app.ActivityCompat
import android.support.v7.app.AlertDialog
import android.support.v7.app.AppCompatActivity
import android.widget.Button
import android.widget.TextView
import android.widget.Toast
import com.google.android.gms.location.*
import java.text.SimpleDateFormat
import java.util.*


class MainActivity : AppCompatActivity() {
    private var mFusedLocationProviderClient: FusedLocationProviderClient? = null
    private val INTERVAL: Long = 2000
    private val FASTEST_INTERVAL: Long = 1000
    lateinit var mLastLocation: Location
    internal lateinit var mLocationRequest: LocationRequest
    private val REQUEST_PERMISSION_LOCATION = 10

    lateinit var btnStartupdate: Button
    lateinit var btnStopUpdates: Button
    lateinit var txtLat: TextView
    lateinit var txtLong: TextView
    lateinit var txtTime: TextView

    override fun onCreate(savedInstanceState: Bundle?) {
        super.onCreate(savedInstanceState)
        setContentView(R.layout.activity_main)

        mLocationRequest = LocationRequest()

        btnStartupdate = findViewById(R.id.btn_start_upds)
        btnStopUpdates = findViewById(R.id.btn_stop_upds)
        txtLat = findViewById(R.id.txtLat);
        txtLong = findViewById(R.id.txtLong);
        txtTime = findViewById(R.id.txtTime);

        val locationManager = getSystemService(Context.LOCATION_SERVICE) as LocationManager
        if (!locationManager.isProviderEnabled(LocationManager.GPS_PROVIDER)) {
            buildAlertMessageNoGps()
        }


        btnStartupdate.setOnClickListener {
            if (checkPermissionForLocation(this)) {
                startLocationUpdates()
                btnStartupdate.isEnabled = false
                btnStopUpdates.isEnabled = true
            }
        }

        btnStopUpdates.setOnClickListener {
            stoplocationUpdates()
            txtTime.text = "Updates Stoped"
            btnStartupdate.isEnabled = true
            btnStopUpdates.isEnabled = false
        }

    }

    private fun buildAlertMessageNoGps() {

        val builder = AlertDialog.Builder(this)
        builder.setMessage("Your GPS seems to be disabled, do you want to enable it?")
                .setCancelable(false)
                .setPositiveButton("Yes") { dialog, id ->
                    startActivityForResult(Intent(Settings.ACTION_LOCATION_SOURCE_SETTINGS)
                            , 11)
                }
                .setNegativeButton("No") { dialog, id ->
                    dialog.cancel()
                    finish()
                }
        val alert: AlertDialog = builder.create()
        alert.show()


    }


    protected fun startLocationUpdates() {

        // Create the location request to start receiving updates

        mLocationRequest!!.priority = LocationRequest.PRIORITY_HIGH_ACCURACY
        mLocationRequest!!.setInterval(INTERVAL)
        mLocationRequest!!.setFastestInterval(FASTEST_INTERVAL)

        // Create LocationSettingsRequest object using location request
        val builder = LocationSettingsRequest.Builder()
        builder.addLocationRequest(mLocationRequest!!)
        val locationSettingsRequest = builder.build()

        val settingsClient = LocationServices.getSettingsClient(this)
        settingsClient.checkLocationSettings(locationSettingsRequest)

        mFusedLocationProviderClient = LocationServices.getFusedLocationProviderClient(this)
        // new Google API SDK v11 uses getFusedLocationProviderClient(this)
        if (ActivityCompat.checkSelfPermission(this, Manifest.permission.ACCESS_FINE_LOCATION) != PackageManager.PERMISSION_GRANTED && ActivityCompat.checkSelfPermission(this, Manifest.permission.ACCESS_COARSE_LOCATION) != PackageManager.PERMISSION_GRANTED) {


            return
        }
        mFusedLocationProviderClient!!.requestLocationUpdates(mLocationRequest, mLocationCallback,
                Looper.myLooper())
    }

    private val mLocationCallback = object : LocationCallback() {
        override fun onLocationResult(locationResult: LocationResult) {
            // do work here
            locationResult.lastLocation
            onLocationChanged(locationResult.lastLocation)
        }
    }

    fun onLocationChanged(location: Location) {
        // New location has now been determined

        mLastLocation = location
        val date: Date = Calendar.getInstance().time
        val sdf = SimpleDateFormat("hh:mm:ss a")
        txtTime.text = "Updated at : " + sdf.format(date)
        txtLat.text = "LATITUDE : " + mLastLocation.latitude
        txtLong.text = "LONGITUDE : " + mLastLocation.longitude
        // You can now create a LatLng Object for use with maps
    }

    private fun stoplocationUpdates() {
        mFusedLocationProviderClient!!.removeLocationUpdates(mLocationCallback)
    }


    override fun onRequestPermissionsResult(requestCode: Int, permissions: Array<out String>, grantResults: IntArray) {
        if (requestCode == REQUEST_PERMISSION_LOCATION) {
            if (grantResults[0] == PackageManager.PERMISSION_GRANTED) {
                startLocationUpdates()
                btnStartupdate.isEnabled = false
                btnStopUpdates.isEnabled = true
            } else {
                Toast.makeText(this@MainActivity, "Permission Denied", Toast.LENGTH_SHORT).show()
            }
        }
    }

    fun checkPermissionForLocation(context: Context): Boolean {
        return if (Build.VERSION.SDK_INT >= Build.VERSION_CODES.M) {

            if (context.checkSelfPermission(Manifest.permission.ACCESS_FINE_LOCATION) ==
                    PackageManager.PERMISSION_GRANTED) {
                true
            } else {
                // Show the permission request
                ActivityCompat.requestPermissions(this, arrayOf(android.Manifest.permission.ACCESS_FINE_LOCATION),
                        REQUEST_PERMISSION_LOCATION)
                false
            }
        } else {
            true
        }
    }

}

That’s it! Now run the project!

The full source code is available here.

Thanks for reading!


RecyclerView With Kotlin – Android

We know that if we need to display a scrolling list of elements based on a large set of data sets which may frequently change we should use RecyclerView.

RecyclerView is a much-advanced version of ListView with a lot of improvements made. You might have Implemented RecyclerView in android with Java but here we are going to learn how to implement a RecyclerView with Kotlin.

Lets go for a detailed tutorial for implementation of RecyclerView with Kotlin Android.

Import the following dependency to the app level build.gradle to add the RecyclerView In your project.


implementation ‘com.android.support:recyclerview-v7:27.1.1’

N we are going to set up the MainActivity layout file activity_main.xml. The Layout consists of a RecyclerView as given below.

activity_main.xml

<?xml version="1.0" encoding="utf-8"?>
<android.support.constraint.ConstraintLayout xmlns:android="http://schemas.android.com/apk/res/android"
    xmlns:tools="http://schemas.android.com/tools"
    android:layout_width="match_parent"
    android:layout_height="match_parent"
    tools:context=".activity.MainActivity">

   <android.support.v7.widget.RecyclerView
       android:id="@+id/recycler_view"
       android:layout_width="match_parent"
       android:layout_height="wrap_content">

   </android.support.v7.widget.RecyclerView>

</android.support.constraint.ConstraintLayout>

Now we are going to set up a list_item_view for RecyclerView which includes only one TextView. The layout file is given below.

list_item_view.xml

<?xml version="1.0" encoding="utf-8"?>
<LinearLayout xmlns:android="http://schemas.android.com/apk/res/android"
    xmlns:app="http://schemas.android.com/apk/res-auto"
    android:orientation="vertical"
    android:layout_width="match_parent"
    android:layout_height="wrap_content">

    <TextView
        android:id="@+id/title"
        android:textSize="18sp"
        android:padding="6dp"
        android:maxLines="1"
        android:layout_gravity="center"
        android:layout_width="match_parent"
        android:layout_height="wrap_content" />
    <View
        android:background="#000"
        android:layout_width="match_parent"
        android:layout_height="1dp"/>

</LinearLayout>

To populate our data with RecyclerView, We need a RecyclerViewAdapter class RecyclerViewAdapter.kt. Which is given below. This class inherited from RecyclerView.Adapter() . It has three abstract methods.

  • getItemCount(): Returns the total number of items in the data set held by the adapter. In our project, we return the size of our dataList Array.
  • onCreateViewHolder(parent : ViewGroup, viewType:int) ; Viewholder :
    This method onCreateViewHolder(ViewGroup, int) create a RecyclerView.ViewHolder initializes some private fields to be used by RecyclerView.
  • onBindViewHolder(holder:,position :int) :
    This method internally onBindViewHolder(ViewHolder, int) update RecyclerView.ViewHolder with the item at the given position and also sets up some private fields to be used by RecyclerView.  in this method we can set up our TextView or any other  Views with our data.

Our RecyclerViewAdapter.kt is shown below.

RecyclerViewAdapter.kt

import android.content.Context
import android.support.v7.widget.RecyclerView
import android.view.LayoutInflater
import android.view.TextureView
import android.view.View
import android.view.ViewGroup
import android.widget.TextView
import com.shrishtionline.recyclerviewwithkotlin.R

class RecyclerViewAdapter(private var context: Context,private var dataList:ArrayList<String>):RecyclerView.Adapter<RecyclerViewAdapter.ViewHolder>() {
    override fun getItemCount(): Int {
        return dataList.size;
    }
    override fun onCreateViewHolder(parent: ViewGroup, viewType: Int): ViewHolder {
        return ViewHolder(LayoutInflater.from(context).inflate(R.layout.list_item_view, parent, false))
    }

    override fun onBindViewHolder(holder:ViewHolder, position: Int) {
        holder.textView.text=dataList.get(position);
    }


    class ViewHolder(itemView: View?) : RecyclerView.ViewHolder(itemView) {
        var textView:TextView =itemView!!.findViewById(R.id.text_view)
    }
}

Now we need to set up our MainActivity.kt class.

  • The class includes a function addAnimals() to add some data to our list.

MainActivity.kt

package com.shrishtionline.recyclerviewwithkotlin

import android.support.v7.app.AppCompatActivity
import android.os.Bundle
import android.support.v7.widget.LinearLayoutManager
import android.support.v7.widget.RecyclerView

class MainActivity : AppCompatActivity() {

    lateinit var recyclerView: RecyclerView
    lateinit var adapter: RecyclerViewAdapter
    var dataList:ArrayList<String> = ArrayList();

    override fun onCreate(savedInstanceState: Bundle?) {
        super.onCreate(savedInstanceState)
        setContentView(R.layout.activity_main)

        //Initializing RecyclerView
        recyclerView=findViewById(R.id.recycler_view)


        adapter= RecyclerViewAdapter(this,dataList)

        //Set up recyclerview with Vertical LayoutManager and the adapter

        recyclerView.layoutManager=LinearLayoutManager(this,LinearLayoutManager.VERTICAL,false)

        //Adding animal names
        addAnimals();

        // Notify the adapter for data change.
        adapter.notifyDataSetChanged()

    }

    private fun addAnimals() {
        dataList!!.add("Dog")
        dataList!!.add("Cat")
        dataList!!.add("Monkey")
        dataList!!.add("lion")
        dataList!!.add("Elephent")
        dataList!!.add("Cheetah")
        dataList!!.add("Snake")
        dataList!!.add("Cow")
        dataList!!.add("Ant")
        dataList!!.add("Tiger")
        dataList!!.add("Lizard")

    }
}

That’s it! Now run the project!

The full source code is available here.

Thanks for reading!


Retrofit with Kotlin-Android

In this tutorial we will learn how to implement Retrofit HTTP client in Android with Kotlin.

Retrofit is a powerful HTTP client for an Android and Java built by awesome folks at Square . Retrofit Configured with convertors makes it easy to serialize structured data sets. Typically for JSON  we uses Gson convertors to serialization and De-serialization process.

Retrofit uses the Okhttp library for for HTTP requests.

Please find the sample project given below.

  • Open your project and add dependencies into app level  build.gradle ( Module:app) file.  Here we adds Gson,RecyclerView,CardView,Piccasso and Retrofit libraries
dependencies {
    ...

    implementation 'com.google.code.gson:gson:2.8.4'
    implementation 'com.squareup.retrofit2:retrofit:2.3.0'
    implementation 'com.squareup.retrofit2:converter-gson:2.3.0'
    implementation 'com.squareup.okhttp3:logging-interceptor:3.8.0'
    implementation "com.android.support:cardview-v7:27.1.1"
    implementation 'com.android.support:recyclerview-v7:27.1.1'
    implementation 'com.squareup.picasso:picasso:2.71828'

    ...
}
  • Make sure you have added the INTERNET permission in AndroidManifest.xml file like this.
<?xml version="1.0" encoding="utf-8"?>
<manifest xmlns:android="http://schemas.android.com/apk/res/android"
    package="kotlincodes.com.retrofitwithkotlin">
    <uses-permission android:name="android.permission.INTERNET"/>

    <application
        android:allowBackup="true"
        android:icon="@mipmap/ic_launcher"
        android:label="@string/app_name"
        android:roundIcon="@mipmap/ic_launcher_round"
        android:supportsRtl="true"
        android:theme="@style/AppTheme">
        <activity android:name=".activity.MainActivity">
            <intent-filter>
                <action android:name="android.intent.action.MAIN" />

                <category android:name="android.intent.category.LAUNCHER" />
            </intent-filter>
        </activity>
    </application>

</manifest>
  • Next we need to create data model to parse our sample Json response . The sample response is given below.
Sample response

  • Now Create a Kotlin Class named DataModel.kt under model package like shown below.

DataModel.kt 

package kotlincodes.com.retrofitwithkotlin.model

import com.google.gson.annotations.Expose
import com.google.gson.annotations.SerializedName


data class DataModel(

        @Expose
        @SerializedName("albumId")
        val albumid: Integer,
        @Expose
        @SerializedName("id")
        val id: Integer,
        @Expose
        @SerializedName("title")
        val title: String,
        @Expose
        @SerializedName("url")
        val url: String,
        @Expose
        @SerializedName("thumbnailUrl")
        val thumbnailurl: String
)
  • Now create a retrofit instance to make a network request to a REST API with Retrofit.
  • Here we creates a Kotlin object ApiClient.kt under retrofit package.
  • The BASE_URL is the basic URL of your API where we will make a call

ApiClient.kt

import com.google.gson.GsonBuilder
import okhttp3.OkHttpClient
import okhttp3.logging.HttpLoggingInterceptor
import retrofit2.Retrofit
import retrofit2.converter.gson.GsonConverterFactory

object ApiClient {

    var BASE_URL:String="https://jsonplaceholder.typicode.com/"
    val getClient: ApiInterface
        get() {

            val gson = GsonBuilder()
                    .setLenient()
                    .create()
            val interceptor = HttpLoggingInterceptor()
            interceptor.setLevel(HttpLoggingInterceptor.Level.BODY)
            val client = OkHttpClient.Builder().addInterceptor(interceptor).build()

            val retrofit = Retrofit.Builder()
                    .baseUrl(BASE_URL)
                    .client(client)
                    .addConverterFactory(GsonConverterFactory.create(gson))
                    .build()

            return retrofit.create(ApiInterface::class.java)

        }

}
  • Define End Points : Now we create an interface ApiInterface.kt under retrofit package to define the api end points

ApiInterface.kt

import kotlincodes.com.retrofitwithkotlin.model.DataModel
import retrofit2.Call
import retrofit2.http.GET

interface ApiInterface {

    @GET("photos")
    fun getPhotos(): Call<List<DataModel>>

}
  • Set up MainActivity Class
  • Now we are all set to make an api call in MainActivity.kt .
  • getData() method is used to make HTTP request using Retrofit
  • Here we fetch data and populate it in to a RecyclerView ,  the RecyclerViewAdapter DataAdapter and RecyclerView layouts are described later.

activity_main.xml

<?xml version="1.0" encoding="utf-8"?>
<android.support.constraint.ConstraintLayout xmlns:android="http://schemas.android.com/apk/res/android"
    xmlns:tools="http://schemas.android.com/tools"
    android:layout_width="match_parent"
    android:layout_height="match_parent"
    tools:context=".activity.MainActivity">

   <android.support.v7.widget.RecyclerView
       android:id="@+id/recycler_view"
       android:layout_width="match_parent"
       android:layout_height="wrap_content">

   </android.support.v7.widget.RecyclerView>

</android.support.constraint.ConstraintLayout>

MainActivity.kt 

class MainActivity : AppCompatActivity() {

    lateinit var progerssProgressDialog: ProgressDialog
    var dataList = ArrayList<DataModel>()
    lateinit var recyclerView: RecyclerView
    lateinit var adapter:DataAdpter
    override fun onCreate(savedInstanceState: Bundle?) {
        super.onCreate(savedInstanceState)
        setContentView(R.layout.activity_main)
        recyclerView = findViewById(R.id.recycler_view)

        //setting up the adapter
        recyclerView.adapter= DataAdpter(dataList,this)
        recyclerView.layoutManager=LinearLayoutManager(this,LinearLayoutManager.VERTICAL,false)

        progerssProgressDialog=ProgressDialog(this)
        progerssProgressDialog.setTitle("Loading")
        progerssProgressDialog.setCancelable(false)
        progerssProgressDialog.show()
        getData()

    }

    private fun getData() {
        val call: Call<List<DataModel>> = ApiClient.getClient.getPhotos()
        call.enqueue(object : Callback<List<DataModel>> {

            override fun onResponse(call: Call<List<DataModel>>?, response: Response<List<DataModel>>?) {
                progerssProgressDialog.dismiss()
                dataList.addAll(response!!.body()!!)
                recyclerView.adapter.notifyDataSetChanged()
            }

            override fun onFailure(call: Call<List<DataModel>>?, t: Throwable?) {
                progerssProgressDialog.dismiss()
            }

        })
    }


}
  • Set up RecyclerView 
  • To set up RecyclerView we need a list layout and RecyclerView.Adapter DataAdapter.kt as given below.
  • The layout includes only a text view to show the title.

list_item_home.xml

<?xml version="1.0" encoding="utf-8"?>
<android.support.v7.widget.CardView xmlns:android="http://schemas.android.com/apk/res/android"
    xmlns:app="http://schemas.android.com/apk/res-auto"
    android:orientation="horizontal"
    android:layout_width="match_parent"
    android:layout_margin="6dp"
    app:contentPadding="12dp"
    android:layout_height="wrap_content">

    <TextView
        android:maxLines="1"
        android:id="@+id/title"
        android:layout_gravity="center"
        android:layout_width="match_parent"
        android:layout_height="wrap_content" />

</android.support.v7.widget.CardView>

DataAdapter.kt

package kotlincodes.com.retrofitwithkotlin.adapters

import android.content.Context
import android.support.v7.widget.RecyclerView
import android.view.LayoutInflater
import android.view.View
import android.view.ViewGroup
import android.widget.TextView
import kotlincodes.com.retrofitwithkotlin.R
import kotlincodes.com.retrofitwithkotlin.model.DataModel

class DataAdpter(private var dataList: List<DataModel>, private val context: Context) : RecyclerView.Adapter<DataAdpter.ViewHolder>() {


    override fun onCreateViewHolder(parent: ViewGroup, viewType: Int): ViewHolder {
        return ViewHolder(LayoutInflater.from(context).inflate(R.layout.list_item_home, parent, false))
    }

    override fun getItemCount(): Int {
       return dataList.size
    }

    override fun onBindViewHolder(holder: ViewHolder, position: Int) {
        val dataModel=dataList.get(position)

        holder.titleTextView.text=dataModel.title
    }


    class ViewHolder(itemLayoutView: View) : RecyclerView.ViewHolder(itemLayoutView) {
        lateinit var titleTextView:TextView
        init {
            titleTextView=itemLayoutView.findViewById(R.id.title)

        }

    }

}

Now we are all done. We have how to implement Retrofit with Kotlin and Implantation of   You can also find the Source the project from 


ViewPager In Kotlin Android

Here we provides a simple tutorials to implement ViewPager in Kotlin.

ViewPager is one of most popular widgets available in android libraries. It is used in most of the famous apps like PlayStore,WhatsApp etc.

ViewPager is a widget that is used to implement tabs in Android Applications. ViewPager allows users to swipe left or right to see new screens.

Setup Layout file

This step is to add ViewPager in your Layout file. Go to your xml file and add the following code into it.

Make sure you have added the following dependency in your build.gradle file

implementation ‘com.android.support:design:27.1.1’

activity_main.xml

<?xml version="1.0" encoding="utf-8"?>
<LinearLayout xmlns:android="http://schemas.android.com/apk/res/android"
    xmlns:app="http://schemas.android.com/apk/res-auto"
    xmlns:tools="http://schemas.android.com/tools"
    android:layout_width="match_parent"
    android:layout_height="match_parent"
    android:orientation="vertical">

    <android.support.design.widget.TabLayout
        android:id="@+id/tabs"
        android:layout_width="match_parent"
        android:layout_height="?attr/actionBarSize"
        app:tabGravity="fill"
        app:tabMode="fixed" />

    <View
        android:layout_width="match_parent"
        android:layout_height="1dp"
        android:background="#c6c4c4" />

    <android.support.v4.view.ViewPager
        android:id="@+id/viewpager"
        android:layout_width="match_parent"
        android:layout_height="match_parent" />

</LinearLayout>

Implementing The Activity

Now we will implement the MainActivity.kt. Please keep in mind.

  • MainActivity class have a Fragment and FragmentPagerAdapter to setup the view pager, this are defined bit later
  • FragmentPagerAdapter inherited from PagerAdapter
  • Function initViews()  initializes the views
  • Function setupViewPager()  setting up the ViewPager 

MainActivity.ktI

package kotlincodes.com.viewpagerkotlin.activity

import android.support.v7.app.AppCompatActivity
import android.os.Bundle
import android.support.design.widget.TabLayout
import android.support.v4.view.ViewPager
import kotlincodes.com.viewpagerkotlin.R
import kotlincodes.com.viewpagerkotlin.ViewPagerAdapter.MyFragmentPagerAdapter
import kotlincodes.com.viewpagerkotlin.fragments.MyFrament

class MainActivity : AppCompatActivity() {

    private lateinit var viewpager: ViewPager
    private lateinit var tabs: TabLayout

    override fun onCreate(savedInstanceState: Bundle?) {
        super.onCreate(savedInstanceState)
        setContentView(R.layout.activity_main)

        initViews()

        setupViewPager()
    }

    private fun initViews() {
        tabs = findViewById(R.id.tabs)
        viewpager = findViewById(R.id.viewpager)
    }

    private fun setupViewPager() {

        val adapter = MyFragmentPagerAdapter(getSupportFragmentManager())

        var firstFragmet: MyFrament = MyFrament.newInstance("First Fragment")
        var secondFragmet: MyFrament = MyFrament.newInstance("Second Fragment")
        var thirdFragmet: MyFrament = MyFrament.newInstance("Third Fragment")

        adapter.addFragment(firstFragmet, "ONE")
        adapter.addFragment(secondFragmet, "TWO")
        adapter.addFragment(thirdFragmet, "THREE")

        viewpager!!.adapter = adapter

        tabs!!.setupWithViewPager(viewpager)

    }
}

Implementing The PagerAdapter Class

Now that we have the MainActivity.kt covered, we need to define the FragmentPagerAdapter Class. We have a addFragment inside FragmentPagerAdapter to add the Fragments .

MyFragmentPagerAdapter.kt

package kotlincodes.com.viewpagerkotlin.ViewPagerAdapter

import android.support.v4.app.Fragment
import android.support.v4.app.FragmentManager
import java.nio.file.Files.size
import android.support.v4.app.FragmentPagerAdapter
import kotlincodes.com.viewpagerkotlin.fragments.MyFrament


class MyFragmentPagerAdapter(manager: FragmentManager) : FragmentPagerAdapter(manager) {
    private val mFragmentList: ArrayList<Fragment> = ArrayList()
    private val mFragmentTitleList: ArrayList<String> = ArrayList()

    override fun getItem(position: Int): Fragment {
        return mFragmentList.get(position)
    }

    override fun getCount(): Int {
        return mFragmentList.size
    }

    fun addFragment(fragment: Fragment, title: String) {
        mFragmentList.add(fragment)
        mFragmentTitleList.add(title)
    }

    override fun getPageTitle(position: Int): CharSequence? {
        return mFragmentTitleList.get(position)
    }
}

Setting Up The Fragment

We are almost finished now we need to setup the Fragmet class. First we need to set the fragment_home.xml layout

Layout have only a TextView to indicate the changes .

fragment_home.xml

<?xml version="1.0" encoding="utf-8"?>
<RelativeLayout
    xmlns:android="http://schemas.android.com/apk/res/android" android:layout_width="match_parent"
    android:layout_height="match_parent">

    <TextView
        android:padding="12dp"
        android:background="#000"
        android:id="@+id/text"
        android:layout_centerInParent="true"
        android:textSize="22dp"
        android:textAllCaps="true"
        android:text="Fragment ONE"
        android:textAlignment="center"
        android:textColor="#fff"
        android:layout_width="match_parent"
        android:layout_height="wrap_content" />

</RelativeLayout>

now we need to setup the Fragment class MyFragment.kt

package kotlincodes.com.viewpagerkotlin.fragments

import android.os.Bundle
import android.support.v4.app.Fragment
import android.view.LayoutInflater
import android.view.View
import android.view.ViewGroup
import android.support.v4.view.ViewPager
import android.support.v7.widget.LinearLayoutManager
import android.support.v7.widget.RecyclerView
import android.view.TextureView
import android.widget.TextView
import kotlincodes.com.viewpagerkotlin.R
import android.provider.AlarmClock.EXTRA_MESSAGE


class MyFrament : Fragment() {
    companion object {
        fun newInstance(message: String): MyFrament {

            val f = MyFrament()

            val bdl = Bundle(1)

            bdl.putString(EXTRA_MESSAGE, message)

            f.setArguments(bdl)

            return f

        }
    }


    override fun onActivityCreated(savedInstanceState: Bundle?) {
        super.onActivityCreated(savedInstanceState)

    }

    override fun onCreateView(inflater: LayoutInflater, container: ViewGroup?, savedInstanceState: Bundle?): View? {
        var view: View? = inflater.inflate(R.layout.fragment_home, container, false);

        val message = arguments!!.getString(EXTRA_MESSAGE)

        var textView: TextView = view!!.findViewById(R.id.text)
        textView!!.text = message

        return view
    }


}

That’s With the above we can simply implement a  ViewPager in Kotlin. you can also get a Source code of the project from GitHub


Get Started with Kotlin in Android studio

Kotlin is fully supported with android studio v3.0 and Higher.

  • Setup Kotlin to Android Studio

Important : The android studio version must be 3.0 or higher

To add Kotlin support to the android studio we need to install the Kotlin plugin for your Android Studio.

To add the Kotlin plugin open

Android Studio File → Settings  → Plugins →type “Kotlin” in search box → Click Browse in Repositories → install →  Restart Android studio to activate the Plugin


Add Kotlin to the existing project

Add classpath in project level build.gradle.

Also here defined a variable kotlin_version as ext.kotlin_version = ‘1.2.41’ to share the version to all.

<// Top-level build file where you can add configuration options common to all sub-projects/modules.

    buildscript {
        ext.kotlin_version = '1.2.41'
        repositories {
            google()
            jcenter()
        }
        dependencies {
            classpath 'com.android.tools.build:gradle:3.0.1'
            classpath "org.jetbrains.kotlin:kotlin-gradle-plugin:$kotlin_version"

            // NOTE: Do not place your application dependencies here; they belong
            // in the individual module build.gradle files
        }
    }

    allprojects {
        repositories {
            google()
            jcenter()
        }
    }

    task clean(type: Delete) {
        delete rootProject.buildDir
    }

2. Add dependencies to app level build.gradle

apply plugin: 'com.android.application'

apply plugin: 'kotlin-android'

apply plugin: 'kotlin-android-extensions'

dependencies {

implementation"org.jetbrains.kotlin:kotlin-stdlib-jdk7:$kotlin_version"

} 


Create a new project with Kotlin

Open android studio then click File –> New project you will get a window like below

Mark Include Kotlin Support 

Press Next–>Opens a page to select minimum SDK version — select API v15

Press Next –>Opens a page to select the default activity type — Choose Empty Activity from the list

Press Next –> Opens a page to change the default activity name

Press Finish — >Opens A new Android Project with Kotlin Support.